How to make a pink paper art installation that is durable?
Jul 16, 2025
Leave a message
How to make a pink paper art installation that is durable?
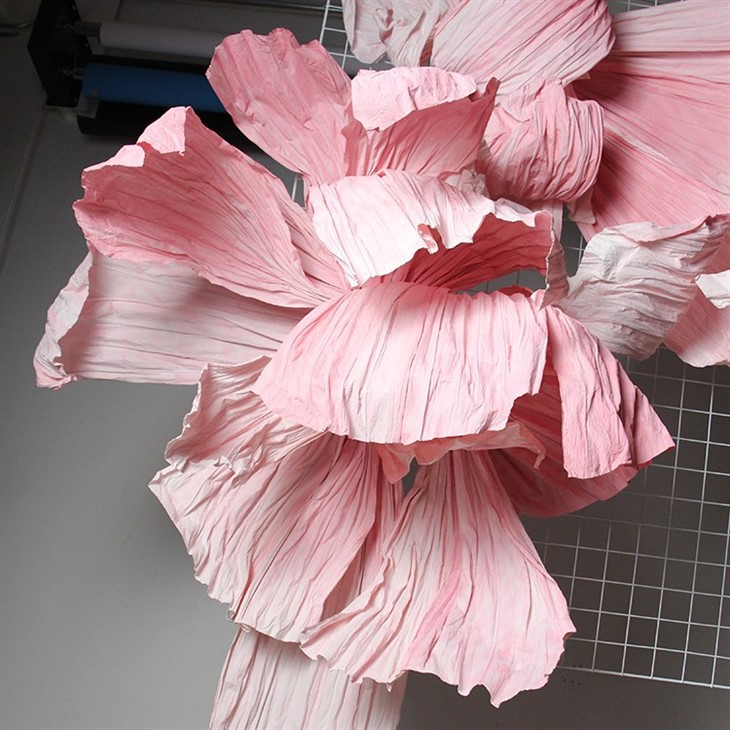
As a supplier of Pink Paper Art Installation, I've had the privilege of witnessing the transformative power of these delicate yet captivating creations. Pink paper art installations bring a touch of whimsy and elegance to any space, whether it's a wedding venue, a corporate event, or a retail store. However, creating a durable pink paper art installation requires careful planning, the right materials, and proper construction techniques. In this blog post, I'll share some tips and insights on how to make a pink paper art installation that stands the test of time.

Selecting the Right Paper
The foundation of any durable paper art installation is the paper itself. When choosing paper for your pink paper art installation, consider the following factors:
- Thickness and Weight: Opt for paper that is thick and heavy enough to hold its shape but not so thick that it becomes difficult to manipulate. A paper weight of at least 80 - 100 gsm (grams per square meter) is recommended for most installations.
- Quality and Durability: Look for high - quality paper that is resistant to tearing, fading, and moisture. Acid - free paper is a great choice as it won't yellow or deteriorate over time.
- Color Consistency: Ensure that the pink color of the paper is consistent throughout the roll or pack. Inconsistent coloring can detract from the overall aesthetic of the installation.
Designing the Installation
Before you start cutting and assembling the paper, it's important to have a clear design in mind. Here are some steps to help you design a durable pink paper art installation:
- Concept and Theme: Determine the concept and theme of your installation. Is it a romantic floral arrangement, a modern geometric design, or a whimsical animal shape? The theme will guide your choice of shapes, colors, and construction techniques.
- Scale and Proportion: Consider the scale and proportion of the installation in relation to the space where it will be displayed. A large - scale installation may require more support and a different construction approach than a small - scale one.
- Sketch and Blueprint: Create a sketch or blueprint of the installation. This will help you visualize the final product and plan the assembly process. You can use graph paper or a digital design tool to create your sketch.
Cutting and Shaping the Paper
Once you have your design and paper ready, it's time to start cutting and shaping the paper. Here are some tips for cutting and shaping paper for a durable installation:
- Use Sharp Tools: Invest in high - quality cutting tools such as scissors, craft knives, and paper punches. Sharp tools will make clean cuts and reduce the risk of tearing the paper.
- Cut with Precision: Follow your design carefully and cut the paper with precision. Use a ruler or a cutting mat to ensure straight lines and accurate shapes.
- Shape the Paper: You can shape the paper using techniques such as folding, rolling, and curling. These techniques can add dimension and texture to the installation. For example, you can create petals by folding the paper into a cone shape and then curling the edges.
Assembling the Installation
Assembling the pink paper art installation is where your creativity really comes to life. Here are some techniques for assembling a durable installation:
- Use Strong Adhesives: Choose adhesives that are strong enough to hold the paper together but won't damage it. Glue sticks, double - sided tape, and craft glue are all good options. Avoid using adhesives that are too wet or sticky, as they can cause the paper to wrinkle or warp.
- Build a Support Structure: For larger installations, it's important to build a support structure to hold the paper in place. You can use wire, PVC pipes, or wooden frames as a support structure. Make sure the support structure is sturdy and can withstand the weight of the paper.
- Layer and Stack the Paper: Layering and stacking the paper can create a more dynamic and visually interesting installation. Start with the base layer and then add subsequent layers on top. Use adhesives to secure the layers together.
Finishing and Protecting the Installation
Once the installation is assembled, it's important to finish and protect it to ensure its durability. Here are some steps to finish and protect your pink paper art installation:
- Trim and Neaten the Edges: Use scissors or a craft knife to trim any rough edges or excess paper. This will give the installation a clean and professional look.
- Apply a Protective Coating: You can apply a protective coating such as a clear spray varnish or a matte sealer to the paper. This will help protect the paper from dust, dirt, and moisture.
- Display the Installation Properly: When displaying the installation, make sure it is in a location where it won't be exposed to direct sunlight, high humidity, or strong winds. These environmental factors can damage the paper over time.
Maintenance and Care
To keep your pink paper art installation looking its best, it's important to perform regular maintenance and care. Here are some tips for maintaining and caring for your installation:
- Dust Regularly: Use a soft, dry cloth or a feather duster to dust the installation regularly. This will prevent dust from accumulating on the paper and dulling its color.
- Avoid Touching the Paper: Try to avoid touching the paper with your bare hands, as the oils and dirt on your hands can transfer to the paper and cause damage.
- Repair Any Damage Promptly: If you notice any damage to the installation, such as a torn petal or a loose layer, repair it promptly. Use the same adhesives and techniques that you used to assemble the installation to make the repairs.
As a supplier of Pink Paper Art Installation, we also offer Color Paper Art Installation Customization services. Whether you have a specific design in mind or need inspiration for your next project, our team of experts can work with you to create a unique and durable paper art installation. We also have experience in creating Artistic Butterfly Photography Installation, which can add a touch of magic to any photography session or event.
If you're interested in purchasing our pink paper art installations or discussing a customized project, we invite you to contact us for a procurement negotiation. Our team is ready to assist you in bringing your creative vision to life.
References
- "Paper Crafting Basics: Choosing the Right Paper" by Craft Magazine
- "Design Principles for Paper Art Installations" by Art Institute Journal
- "Techniques for Assembling and Securing Paper in Installations" by Craft and Design Quarterly